7 Steps to Getting Started in Apple Garageband
with Your Recording Audio Interface. A Very Basic Guide for the New User by Joe Schlicht
In this article I will walk you through how to get started in Apple GarageBand with your recording audio interface. I'll assume that you have an Apple computer with GarageBand installed.
First I'll go through the setup of your interface and drivers, then I'll walk you through setting up your first track for recording. I'll go into more detail in future articles for tips on how to record multiple tracks and to mix, apply effects, and master your recording to CD or an MP3.
This article however is focusing simply on how to get started recording your first track.
From set up of your recording audio interface, installing the drivers, to setting up the software for recording your first track. For Demonstration purposes I will be using my awesome red Stratocaster plugged directly into my audio interface using the instrument input (or DI - Direct Input) and using one of GarageBand's amp models.
What you will need:
A mac computer with Apple GarageBand installed
An internet connection (optional)
A recording audio interface with appropriate digital connection
An instrument (guitar) or voice to record
An instrument or Mic cable (depending on how you record)
Headphones or studio monitors
Step 1:
Identify the recording audio interface you are going to use for recording. (For more info on recording interfaces click here) Go to the manufacturer's website support page and download the latest driver for the operating system you are using (must be Apple's operating System for using GarageBand).
In this article I will be using the Focusrite Saffire LE recording interface as an example. Install the driver on your computer as per the instructions dialogue. You may or may not be required to restart your computer once doing this.
Step 2:
Hook up your recording audio interface to your Mac. Make sure you use the appropriate digital connection, USB if you have a USB device or Firewire if you have a Firewire device. The Saffire LE is a Firewire recording device.
Step 3:
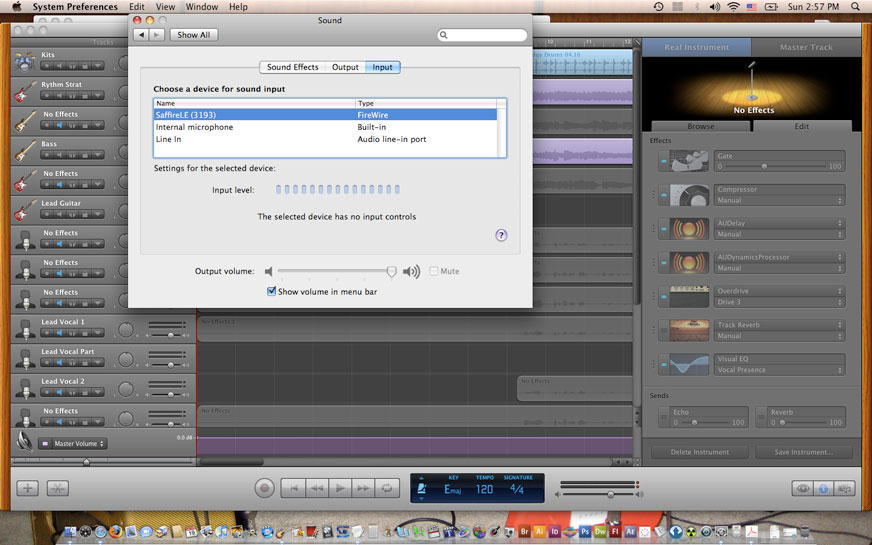
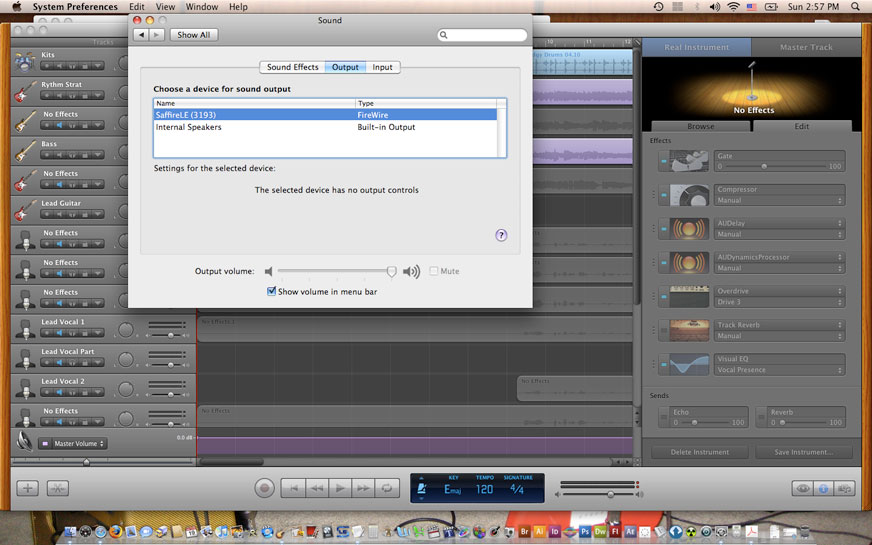
Change your Sound settings in the Mac's System Preferences (see pic 1 below or click here) to use your recorder device rather than the built in audio from the computer. Change both the input settings and the output settings.
Pic. 1
(pic 2)(pic 3) This allows you to record and playback sound using your audio recording interface rather than your computers built in audio card, which is generally quite inferior to an audio interface.
Step 4:
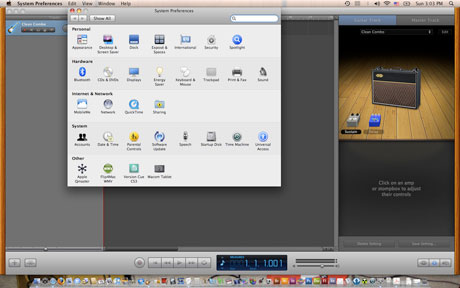
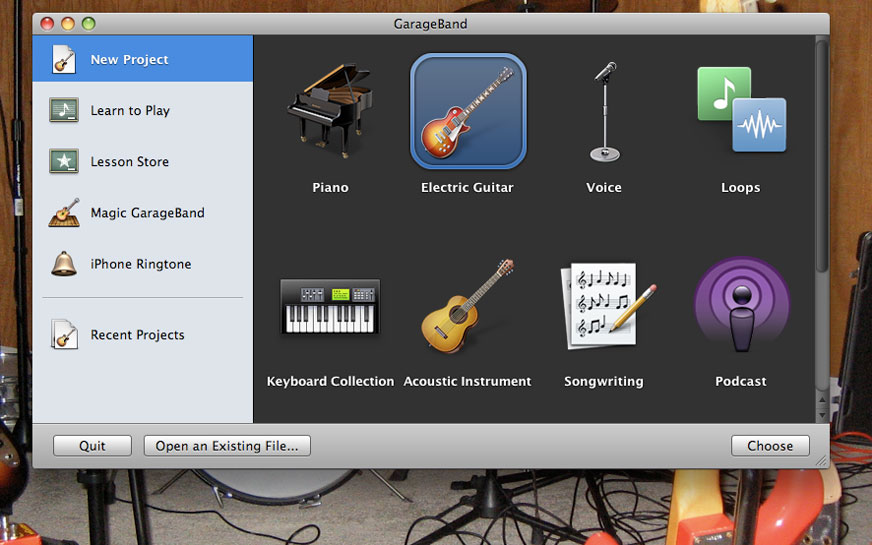
Open Apple GarageBand and choose your type of project. Do you want to record guitar, piano, vocals, etc? Don't worry if you want to record more than just what is in the open dialogue box. Apple Garageband makes you choose, and you can always add or subtract tracks when the project is open.
Here I will choose "Electric Guitar" and then another window pops up where you can name and choose a location to save the project (pic 4). If you know ahead of time what tempo and key your song is going to be in you can chose those below (see pic 5 below or click here). If you get the project open and you decide you want to use a different key, don't worry. You can change that within the project as well.
Pic. 5
By establishing a key, this helps Apple GarageBand help you choose loops that are in the same key of your song if you choose to include GarageBand loops in your song (more on this in a later article).
Step 5:
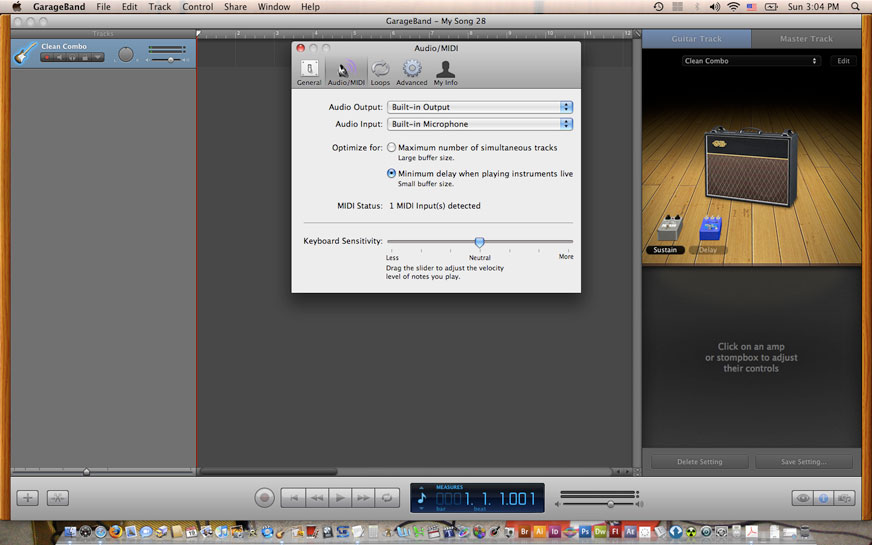
Under the Apple GarageBand menu in the upper left corner choose preferences from the pulldown (pic 6). In the preference window click on the "Audio/MIDI" button (pic 7) and you will see 2 pulldown menus for "audio output" and "audio input."
For both output and input choose your audio interface, rather than the default built in audio (pic 8). If your drivers are installed properly, your Mac will see the interface if it is connected.
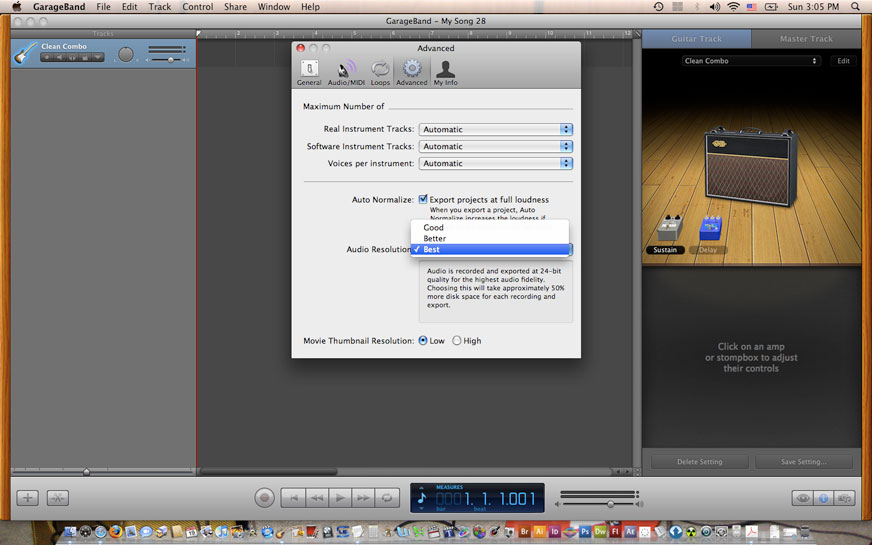
You can choose to set your buffer as well in this window. I choose a small buffer size for minimum delay (pic 9). Next choose the "Advanced" button at the top of the preferences window (pic 10). For resolution I like to have it set on best. This records your audio at 24 bits for the highest quality sounds. If you are low on disk space you may want to choose good quality, but that records your audio at 16 bits, which is still CD quality. Close the preference window.
Now you are ready to begin
recording your first track.
Step 6:
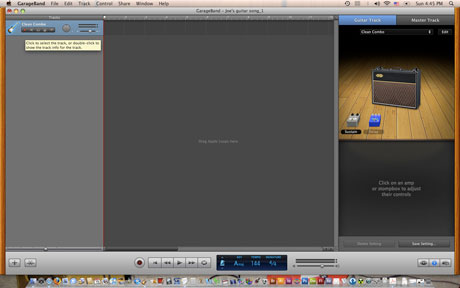
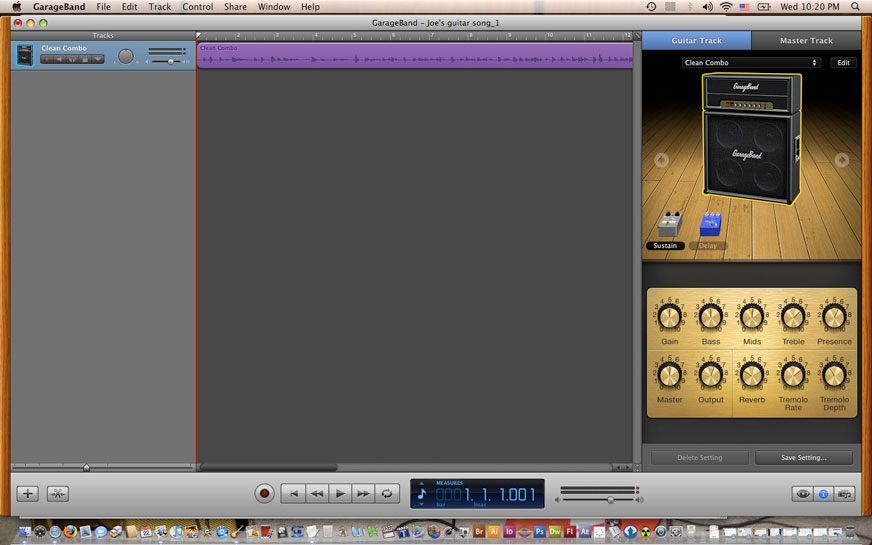
Since I chose "Electric Guitar" for my project, by default Apple GarageBand makes your first track that is designed to work with the new guitar amp models (see pic 11 below or click here), modeled after some of the most played and sought after amplifiers, like Marshall, Fender Tweeds and Blackfaces, and the Vox AC30.
Pic. 11
Also included are some stompbox effects modeled after some popular guitar effects pedals that you can add. You also have use of the additional plug-in effects that Apple GarageBand has, like the eqs, reverbs, delays and compressors, that you can use in your recording chain, or add them later on in the mixing process.
Make sure you have an instrument or mic plugged into your audio recording interface. If you are recording for guitar, like in my example here you can choose to record it with the instrument DI (Direct input) on your audio interface and utilize GarageBand's amp models, or you can record a real amplifier with a microphone plugged into the XLR input of your audio interface.
Note: if you choose to record a real voice or instrument with a microphone you need to choose a "Real Instrument" track for this process. Since I have elected to choose "Electric Guitar" in the open dialog box, Apple GarageBand assumes that I will record direct and utilize the built in amp models.
For the purpose of this guide on getting started I will be using a DI input and using one of the new amp models in Apple GarageBand. Stay tuned for an in depth guitar recording techniques article on how to record guitar with an amplifier and a microphone. This is my preferred method, but I will also have a guide that is more in depth on recording for guitar direct and using GarageBand's amp models.
On your audio recording interface, check the input level of your instrument.
For example I have my red stratocaster plugged into my Saffire in the instrument input 1 and I strum the guitar fairly hard to see the clipping point. The clipping point is usually indicated by a red LED light on the input channel of the recording interface you are using. If you see this light come on it means that you are over modulating the input signal and it is causing distortion.
That's a bad distortion - not the good kind from your guitar amp - and you want to avoid this by backing down on the gain by turning down the gain knob. Don't back off too far, just enough so that your are no longer clipping the input signal. The goal is to have a nice clean, strong signal that doesn't distort. Once you are satisfied that you are not clipping your input signal, it's time to begin recording.
Step 7:
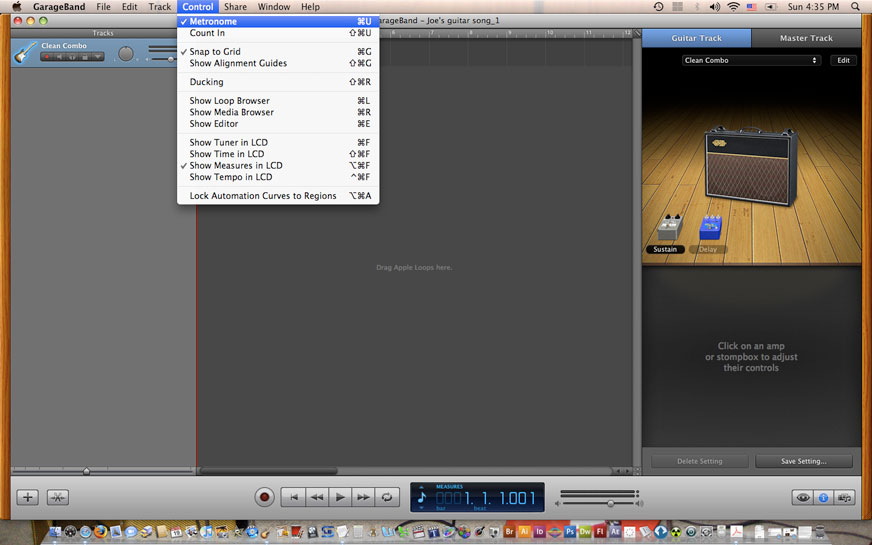
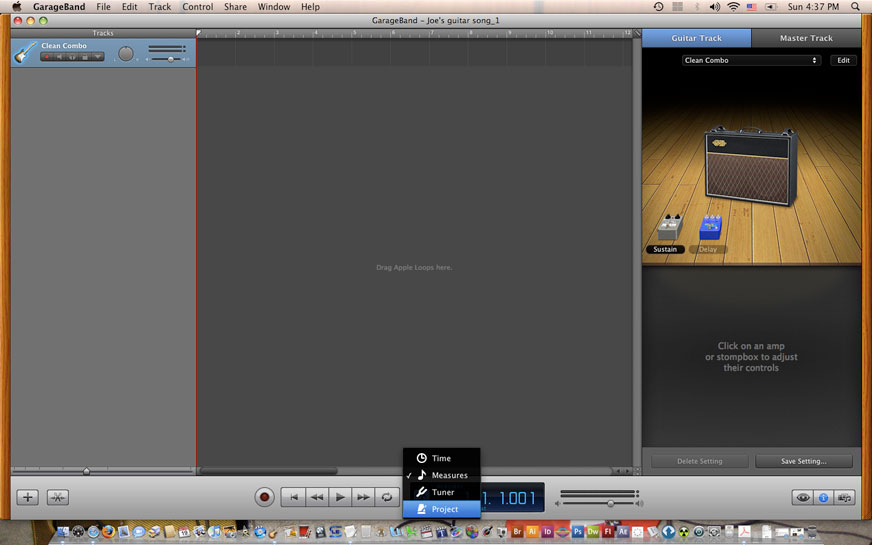
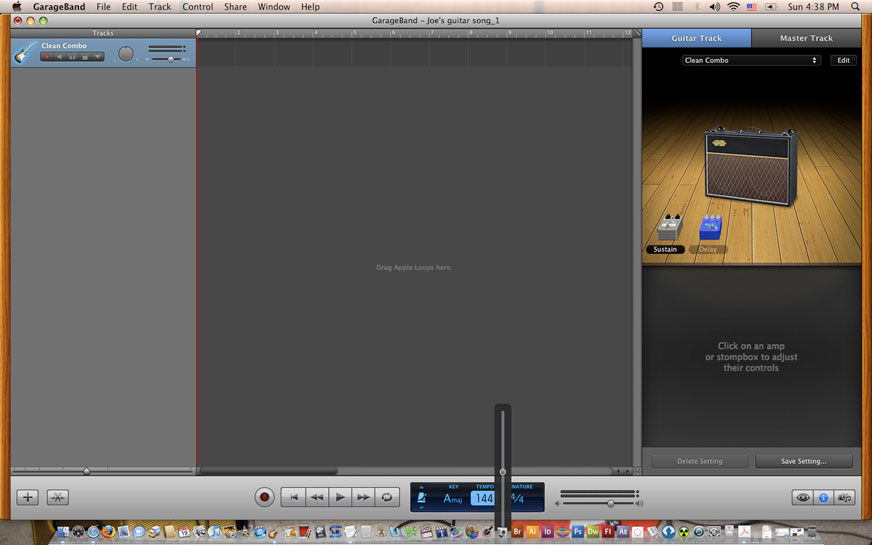
If you wish to have a metronome while recording you can set this up by going to the "Control" menu at the top (pic 12). This enables a click track you hear while recording that is set up to the tempo that you chose while setting up your project in the save window. If you want to change the tempo of the metronome you can do that by going to the virtual LCD display at the bottom of the Apple GarageBand window (pic 13)(pic 14). If you also decide you want to change the key and time signature you can do that there as well.
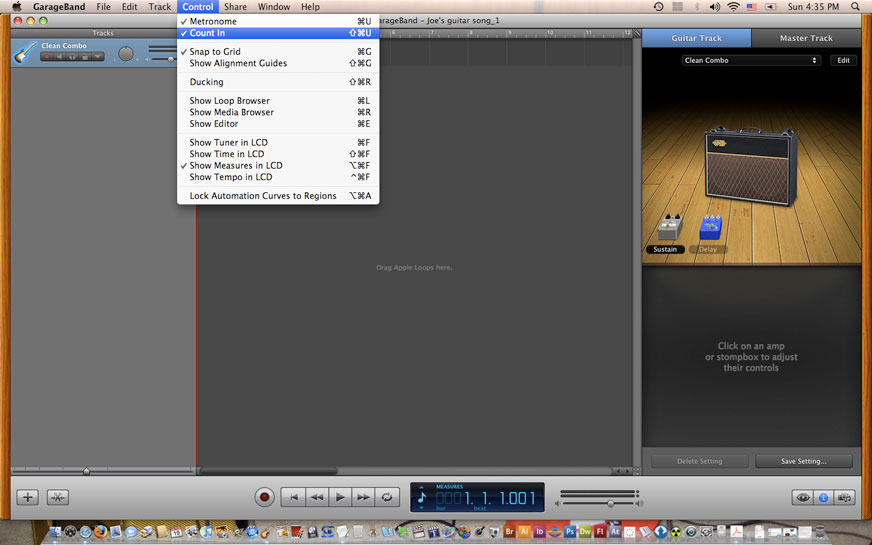
Additionally you can choose to have a "count in," which gives you a measure's beat before the recording begins. This helps you get a feel for the rhythm right before you begin recording so you can come right in on the downbeat. You can activate this feature in the same place where you chose to have the metronome - the "Control" menu at the top (pic 15).
Now it's time to lay down your first track.
Make sure the track is enabled for recording (it should be by default). It is the little red record button at the left of your track (see pic 16 below or click here). Now with your instrument ready, headphones on, strum some chords, sing into the mic or test out whatever you are recording.
Pic. 16
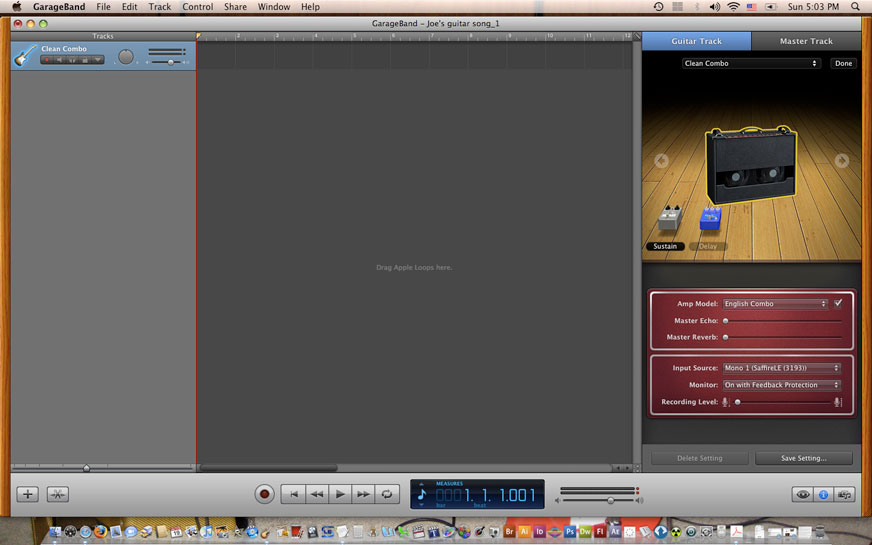
**Important- If you don't hear any sound chances are the monitor setting is set to "off" within your track. To set it to "on" go to the amp model window (for those using the guitar track method) and double click on the virtual amp. The amp turns around to the back, and the settings in the window underneath appear (pic 17). You'll see some pull down menus for "Input Source" and "Monitor."
Check to make sure your input source matches the input you plugged your guitar or instrument into. In the case for my guitar into the Saffire, I am using the input 1, and it should be "Mono 1" for guitar (pic 17). For "Monitor" choose "On with Feedback Protection" (pic 17). Now when you strum your guitar you should be able to hear sound.
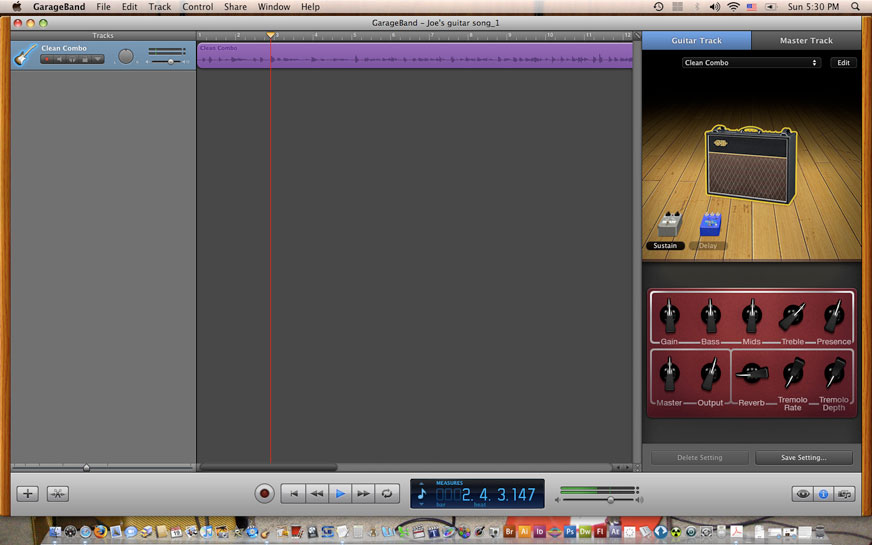
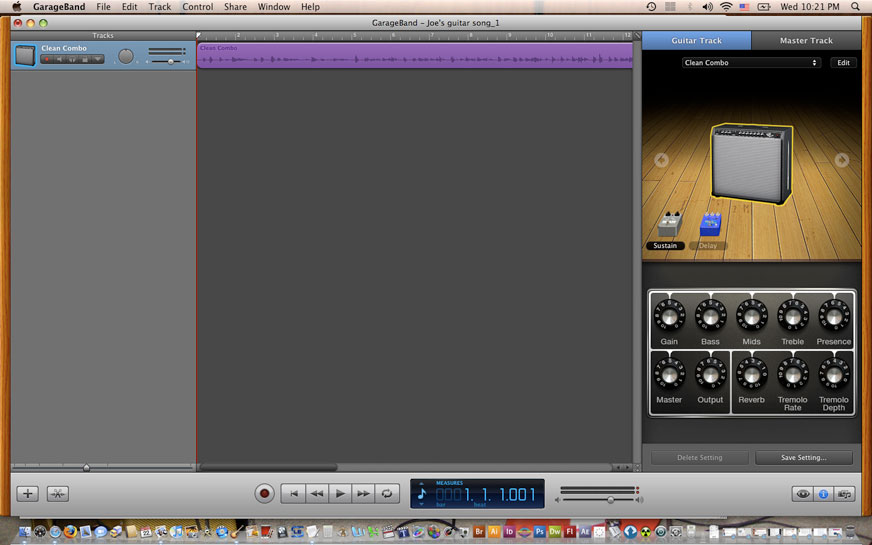
Double click the virtual amp again and you will see it turn around to the front. You will also see the virtual amp settings that you can adjust to taste (pic 18).
**Note- once you record your track using an instrument input and the amp models in Apple GarageBand, you don't have to commit to the sounds you chose when recording. You can simply change and tweak the amp model later as often as you like until you are satisfied with the tone.
(pic 19)(pic 20)(pic 21)
When you are comfortable with the sound you are getting (remember you can change it later), press the record button on the bottom of Apple GarageBand and you will hear the clicks of the measure of count in.
Apple GarageBand begins the recording on the 1st beat after the count in, so be ready. Begin recording your song. After you are satisfied you can push the space bar to stop the recording and then you can listen to what you just recorded by pushing the "go to the beginning of the song" button (see pic 22 below or click here) to take your playhead to the beginning.
Pic. 22
You can then press the play button, or I like simply using the space bar to begin playback and to stop it as well. If you are happy with your recording, go to "File" in the menu up top and choose "Save" (pic 23), or the keyboard shortcut command - Apple (or Command) S. If you are not satisfied with the recording you can either choose undo in the "Edit" menu at the top, or the keyboard shortcut - Apple(Command) Z - immediately after recording. Your track will disappear and you can begin again.
If you have made several changes after the recording, like changing the amp model, adding effects etc. and are still not satisfied, you can no longer undo the track, so just simply delete the track by clicking the track and hitting your "Delete" button on your keyboard.
I hope this guide has taught you how to get set up with your first recording into Apple GarageBand with your audio recording device. If you have any questions or comments feel free to contact us through the Home Recording Hub website.


