Does size matter?
That depends if you have one or not...
a mixing board that is. by Ron Tongue
You may not even need a mixing board with all the options in today's home recording studio configurations. Just like other parts of your home recording studio, the mixing console serves two basic functions.
An object to pass your audio tracks through to your recording device (computer, hard disk recorder, FireWire interface...).
Before I get into too much detail, let's first determine if you even need a mixing console. One way to determine this is by deciding how many tracks of audio you would like to be able to record simultaneously in your home recording studio.
If you answered 2 - 4 tracks, then you may very well not even need a mixing console. You could purchase a FireWire interface with 2 - 4 preamps and record, mix, and master directly on your computer. But if you answered more than four, read on.
So you know you want the ability to record several tracks at once. What should you look for next? Preamps, inputs, and outputs.
Preamps
The preamp is probably the most important part of the mixing board. This is because the preamp takes the audio signal from your instrument or microphone and amplifies it to a recordable level (volume). Ideally your mixing console will have one preamp for every input or channel on the board.
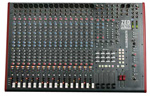
To determine how many preamps are on a mixing board, simply count the number of gain or level knobs at the top of each channel strip.
Warning!! Cheap preamps add significant noise to your sound. Turn the level way up and you'll see what I mean.
Inputs
Hopefully, the number of inputs is the same as the number of preamps. Look for an XLR input AND a balanced ¼ inch input for each channel. You may also see and "insert" jack. This is for adding effects such as a compressor to individual tracks. We'll talk more about that later.
Outputs
Lastly check the various output options on the mixing console. For recording purposes, it's very handy to have a direct out on each channel.
If your mixing board does not have direct outs, you would need to either premix the audio and record to two tracks or use the sub channels. This defeats the purpose of multi-track recording.
Tip!! Make sure your mixing console has direct outs. You'll thank me for it later.
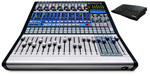
I highly recommend taking a look at Mackie mixing consoles. For home recording studios, the Mackie Onyx is a perfect companion. It has excellent preamps, it's available in several different input sizes, and has direct outs for recording. To top it off, if you add the FireWire option, you can record directly to your computer and kill two birds with one stone!
A Detailed Overview of the Various Options
Found on many Mixing Boards
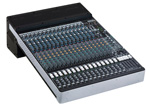
Let's take a closer look at the different sections of a mixing board and it's functions. Keep in mind, that there are tons of different models and designs. I'm going to go over the most common functions that are found on many recording consoles. I'll be referencing the Mackie 8 Bus console since it's what I'm currently using in my home studio.