Mixing Audio and Adding Effects in
Apple Garageband by Joe Schlicht
OK, ready for some audio mixing? So now that you have recorded the tracks for your song, (incidentally this process is also called tracking), and you are pleased with your performance, it's now time to do some mixing and adding effects to your project. Time for fun!
Luckily, these tasks are all very easy to do in GarageBand, and once you get comfortable with the tools, your project will become a piece of cake from a technical standpoint. The hard part is to make sure your project to sounds good for all the intended ways of listening, whether it be for your car, on your home stereo, for TV broadcast, or even your iPod.
The real trick is to get one nice balanced even sound for all of those intended ways of listening.
That has a lot to do with the reference monitors you mixdown on, but it also helps to listen to a particular mixdown in different environments to see how well it translates to other listening systems.
NOTE!!You might have what you think is a great mix in your headphones, but then you burn a CD and play it in your car and it sounds too bass heavy or maybe it sound too thin. Well that means it didn't translate so well. This has EVERYTHING to do with your monitors, or headphones, or whatever you choose to use.
A good pair of studio reference monitors are invaluable for mixing. Even mediocre monitors will suffice if you are crafty enough to "learn" those monitors. Overtime you can get so comfortable with a pair of monitors that you'll know how to trick your mix so that it will translate to other systems perfectly.
Alright. Enough shop talk...
In the last session I left off with a quick basic rock tune with a I-IV-V progression that included an Apple Loop drum track as well as a bass guitar track and three electric guitar tracks all using the Amp Modeling within GarageBand. You can hear the pre mixing track samples here.
As you listen to them, you will notice that they sound pretty rough, and perhaps a bit muddy, so in this session I'll show you how to smooth out the mix by adding effects and mixing the song. Keep in mind, this is how I do it.
And remember as I have stated in previous sessions, there are no rules, only a million different ways to do things, that's the beauty of digital recording.
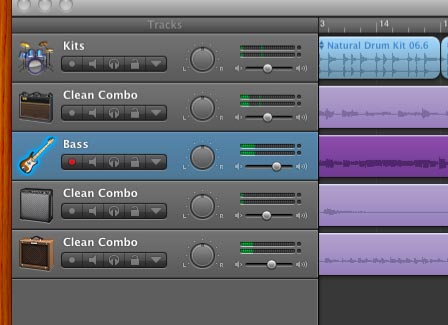
The first thing I do is listen to the tracks and balance out the levels. Use the level slider for each track to adjust the levels.
If you set proper levels while recording you shouldn't have to do much adjusting to your levels at this stage. I solo each track and try to achieve a strong level without clipping within that track.
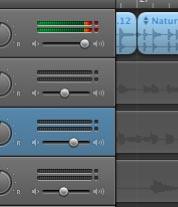
Clipping is an over modulation of the audio signal - a signal that is too hot - so it it will sound distorted. You can hear severe clipping, but you can also see it in your level meter. Audio that is bouncing into the red is on the verge of clipping. Once you see it hit the dot after the level meter, or clip indicator, it means the track has clipped.(see pic) If you see your levels clipping turn the level down so it is not clipping, but don't over do it, you want to have a nice strong signal.
Note!!If your track is clipping or was clipping and you made a level adjustment while a track is still playing, you will see that clip indicator still shows red. You can reset it by simply clicking right on the clip indicator and continue to listen and watch for additional clipping.
Once I find a good level for each soloed track, I then listen to all of them together, or a group together like bass and guitar only. I try to listen to the rough mix to get an idea of where i need to start.
What sounds too loud it the mix?
What is too low?
What's getting lost altogether?
I then make fine adjustments to the levels to get the sound balanced to how I like it. Listen and then listen some more. If your ears get fatigued take a break and come back to your mix later with fresh ears.
Note!!Keep in mind that not only can you adjust the levels, but one very powerful adjustment is panning. Panning allows you to adjust how far left or right a signal is in the stereo sound field, or soundstage. I think this might be overlooked by many beginners, but the use of creative panning can help "place" instruments within the soundstage.
Say you have two rhythm guitar parts but they sound muddy together. Rather than giving up on one of them, try panning one left and the other right. Adjust to taste. Does that keep the tracks from competing with each other? Often times I pan two guitar tracks left and right, and often times not equal. The right guitar track may be panned slightly right, while the left guitar track may be panned hard left - meaning all the way - or some variation in between.
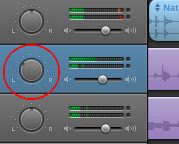
To adjust the panning of a track, with your mouse simply click on the pan knob (see pic) and adjust it left or right. You can see a value assigned to how far you pan. You can make note of that value if you like, perhaps you want to pan certain tracks equally left and right, but ultimately use your ears. To take the panning back to center, turn the knob back to center, the value will be "0."
At this point I also experiment with effects, by adding EQ and/or compression to a track to see if the sound is enhanced.
Do the effects help the track sit in the mix better?
Does it make it worse?
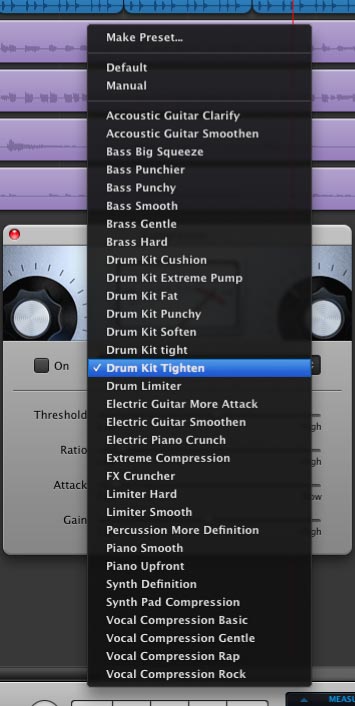
Be careful not to add too much EQ or compression. I know it's easy to get carried away, but a little bit will go a long way. One thing I always start out with, and often keep are the handy preset effects within GarageBand. They are labeled easily with descriptors for the intended use.
For example in the compression presets you can find Bass Smooth, Bass Punchy, Electric Guitar More Attack, or Drum Kit Tighten. You get the picture... (see pic)
Note!!You cannot add the traditional list of effects to Electric Guitar Tracks that were created using the new Amp Models. I wish this were not the case, but I guess Apple wants you to use the stomp boxes and amp knobs for effects on these tracks. With Electric Guitar Tracks you are limited to whatever presets are listed as well as tweaking sound within the amps and stomp box effects.
Also know that effects within GarageBand are non destructive, meaning that you can add them, change them or take them away without harming the original audio file. This is a good thing!
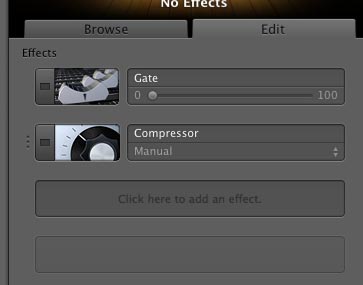
To add an effect to a track that is not an Electric Guitar Track, first make sure you are clicked on the track you wish to add an effect to, bass guitar for example. In the track info window, click the Edit tab.
There you will see some default effects as well as blank windows for effects of your choosing (see pic). You can choose to use up to four additional effects along with the default Gate, Compression, and Visual EQ effects. Also at the bottom you can see Echo and Reverb sends that feed to the master track.
Just because these 5 effects are default does NOT mean you have to use them, but if you choose to, like the other effects, there are a whole list of presets that you can use for each of these, or you can tweak your own and save them as presets.
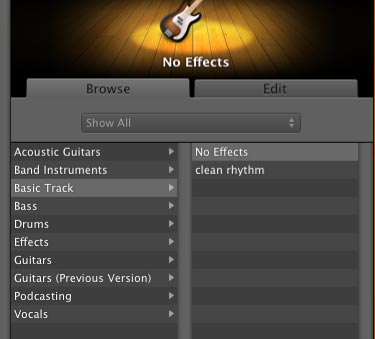
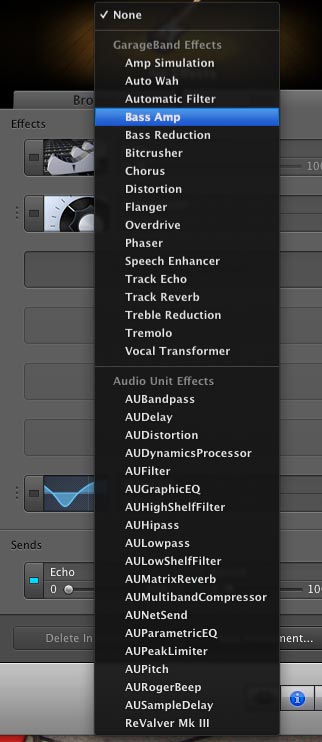
Let's say I want to add a Bass Amp model effect to my bass track. Simply click in an available blank window and a list of effects appears. Scroll up and find Bass Amp, should be fourth from the top (see pic). You can see that it's a default preset.
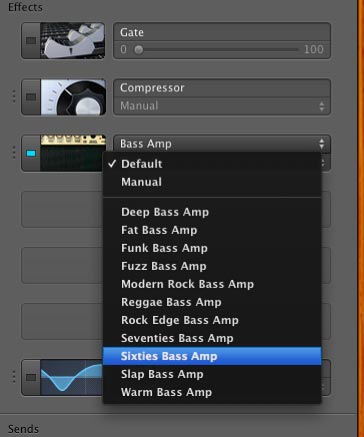
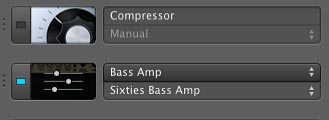
You can click on the default bar and another list appears of the preset bass amp models. Choose one to try (see pic). You can always change it later. If you wish to tweak even further, scroll your mouse over the picture icon of the effect to left of the effect list. You can see that as you scroll over some adjusters super impose over the effect picture. see pic
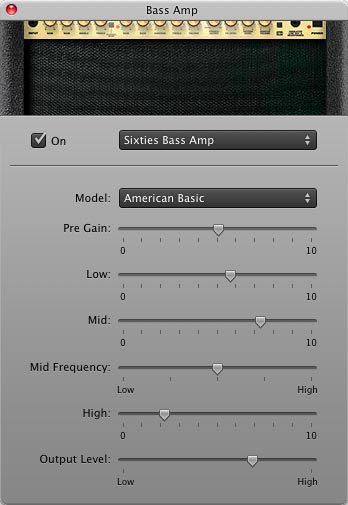
This is telling you that you can click there for further tweakablilty. Oh Joy! If you click there you see another window pop up (see pic). This is where you can adjust the parameters of the amp itself, or change amps altogether. As you can see, there are a handful of bass amp models to choose from.
Note!!You will see in the effect list that it is divided by GarageBand Effects in the top half and Audio Units in the bottom half. Audio Units are effects that are global to your mac, so they can be accessed within any program you use, like Logic Pro, or Final Cut Pro for video editing. If you have 3rd party effects plug-ins and they are in the form of Audio Units, this is where you can access them.
If installed properly, your plug-ins will show up in the list just like all the other effects (see pic), and when you choose it, a window will pop up for the GUI of that plug-in and you can tweak for there. In this example I have the Peavey ReValver plug-in installed.
I don't want to really use ReValver on my bass at this point, I just wanted to demonstrate how to access other plug-ins. To clear it out, simply click on the effect list bar and scroll to the top and choose None. This clears the window leaving it ready for your next effect. Or if you know what effect you want to replace it with, you can simply choose it in the list instead of choosing none.
OK that pretty much wraps up this session on mixing and adding effects. As I have stated earlier the important thing is listening to your mix. This is the creative part, and it's also very subjective and perhaps even personal. You are the artist and you have these tools within Garageband at your disposal to create whatever you desire. The possibilities are virtually limitless.
Stay tuned for further sessions where I will discuss editing, automation, and mastering, and "bouncing" to disk.
Here is a sound file of the I-IV-V song after I have mixed it and added some effects. You can compare it to the non mixed version from the previous session. I hope that you hear an improvement.


